Monday, October 24, 2016

Coat progress

How wonderful to have had those few days sewing together with friends. I’m back home now and it’s been great. We concluded that at home we all seldom have time to have so much dedicated sewing time in a few days (or even during one day). For me it was great to start on the coat and have it close to finishing. It still needs a couple of hours, but it would have taken me much longer otherwise.

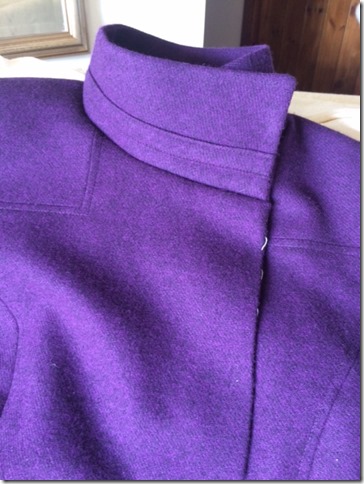
Discussing design options, fitting, techniques is a great aspect of a get together with sewing friends. This collar and inset was something that was not in the original pattern but the result of discussing the muslin. I was not happy with the collar of the original (just a rectangle) and lowered it center front, gave it shape and added the trim. Initially the trim was a different fabric, but after two hours of work and not being able to attach it in a satisfactory way I was considering my options when Viv added another option to the mix and this is the result.

IMG_3983
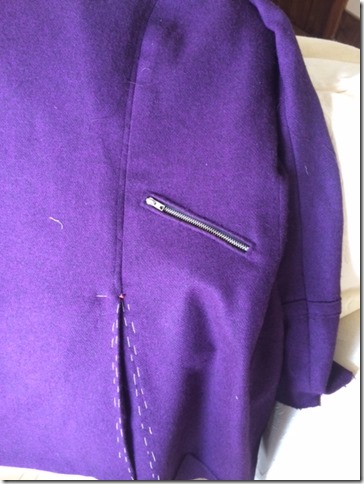
Added a pocket with zipper:

IMG_3981

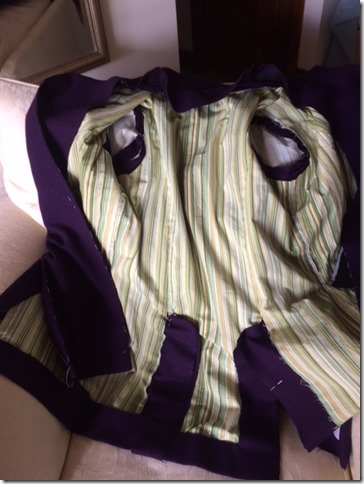
And because the fabric was thinner I added interlining as an afterthought. I used an extra layer of cotton fabric giving the coat more weight and an extra layer against the cold. As I did not initially plan for the interlining, I sewed it in to the seam allowanced instead of adding it to the pattern pieces in an earlier stage and  then use it as one layer of fabric. After the coat is finished you will not see this fabric any more. During these get togethers we always do an “ugly fabric swap” and this was what I ended up with(it’s always a hilarious hour when we swap, you don’t know what’s there and you don’t know what you’ll get till the very end because of the rules of the game). It was exactly enough for this and I was happy to use it as I had no fabric with me to use as interlining.

IMG_3979

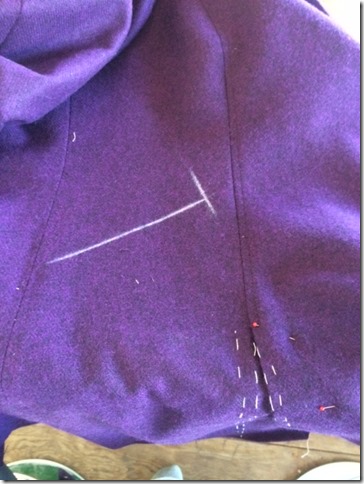
The pocket placement was marked on both sides using tailors’ chalk. I first marked one side with a thick line.

IMG_3973

Then placed the other side of the coat over it, matching seams, hit it hard with my hand and the marking was on the other side as well.

IMG_3975

As I said, there’s still a bit to be done but hope to finish it very soon.
Saturday, October 22, 2016

Time flies

I had absolutely no idea it’s been almost two weeks already since my last post. In my mind it was only a week. My son’s shirt is a bit further as it was 12 days ago, but I took off the collar and stand because I was not satisfied with it and will have to redo the stand. It’s on hold for a moment, as preparation for my annual sewing event took precedence.

Since Wednesday I’m staying in Canterbury (UK) with my group of sewing friends, having great fun and sewing together. Lot’s of chatting about sewing in general, (specific) patterns, fabrics etc. What could be better?

My project is to sew a winter coat. I made two muslins prior to the event and decided on one of them, with some alterations to the style.

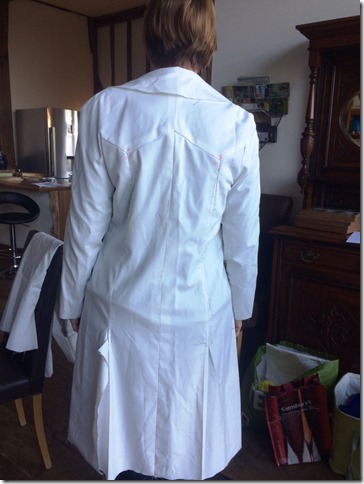
This is the back of the first muslin, a beautiful Marfy pattern with very special design lines. The pattern was in my size by the size charts, but too small. I had let out seams already but there was not enough space at my back and the raglan-type sleeves and couldn’t move my arms properly. Too much alteration needed to be comfortable, so this was not the pattern I have chosen to make.

IMG_3911

This is a Burda pattern in a very different style. Shorter, pleats in front and back, regular 2-piece sleeve and collar that is partially left open. Nice idea, but in discussing all options and ideas with my friends, I decided to change the collar.

IMG_3913

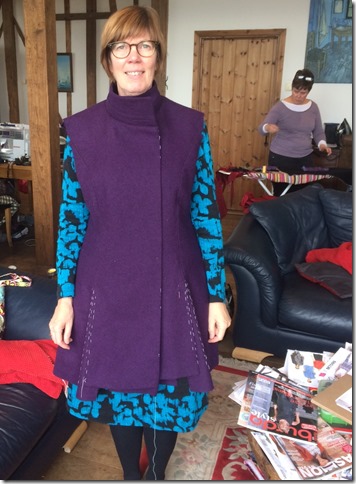
A quick picture of how it was looking this afternoon. In the meantime the hem is properly done and a sleeve is attached. Not the most flattering look with this dress underneath. (do you see the table with magazines and pictures?) The coat is fully interlined with cotton to make it warmer, as the fabric itself was just a tiny bit too thin. Must remember to take some inside pictures tomorrow.

IMG_3959

Our sewing tables and sewing machines.

IMG_3933

To the friends who could not join us this year: we’re missing you!

Hope to at least finish the outer layer of the coat tomorrow, which is the last full day we have, time flies too fast for this weekend too.

Monday, October 10, 2016

First steps

Thank you for your kind comments on my posts last week, it feels good to be back again. And a special thank you for those of you who gave suggestions or links to information on making a men’s shirt. Very helpful.

A side note on comments: I can’t reply to individual comments on my computer, somehow that’s only possible viewing my blog on my phone (must be browser specific). As I prefer working/typing on my computer, I don’t often reply to individual comments. Just know that I read and love them all).

Isn’t it strange, that somehow making a men’s shirt felt a bit intimidating? Like Nancy said, I’ve made a lot of shirts for myself. Also I”m not scared of (more) difficult projects and still a men’s shirt sounded like unknown territory. It isn’t actually. Once I was busy with cutting out the pattern pieces, sewing the yoke to the back it’s the same. The technique for sewing the sleeves and the side seams are a bit different, but other then that it’s about finding/using the right interfacing for the collar (heavier than a women’s shirt).

Working with a striped fabric is not new to me and I can get very ocd about matching stripes. Did a good job here I think.

DSC_2146

I did the chevron stripes in the way Pam Erny describes it here. Don’t know how I did not think of her tutorials, as they are so good and she’s a professional shirt-maker.

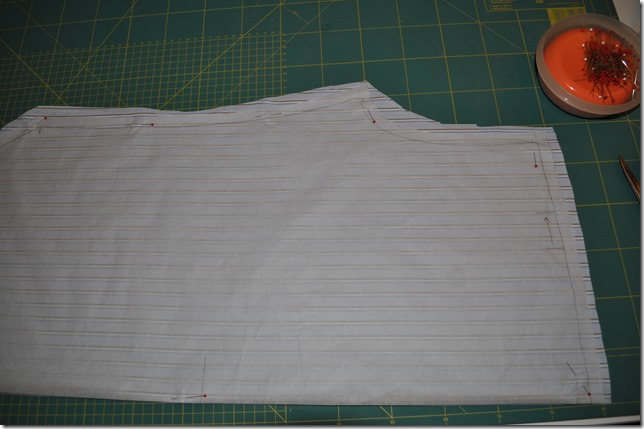
For the other pattern pieces I roughly matched the stripes, cut around the pattern pieces (to which I added seam allowances this time) and then matched the stripes for each individual piece before cutting at the seam allowances.

DSC_2138

As you can see the fabric of the two layers shifted a little before the final cutting. A bit more time but for me a necessary step.

DSC_2140

Saturday, October 8, 2016

Unselfish sewing

Could also have the title “venturing into new territory”.

Recently my son was looking for a shirt to wear to an interview, he has a few but more often he takes one of my husband/his father. The fit is not perfect, as my son has broad shoulders and is taller but in general my husbands’ shirts are nicer quality. In a weak moment SmileI offered him to make a shirt. Perhaps I’ll regret the offer later on. I’ve never sewn for my husband, he’s very satisfied with the fit of rtw and always said not to bother. To be honest, I was happy with that. Now I like the idea to venture into new sewing territory. For the moment I’ve decided on a pattern and found suitable fabric in my collection.

The pattern will be Burda 6874, an envelope pattern. The fabric a good quality cotton, in my collection for I guess 10 years or more.

DSC_2137DSC_2136DSC_2135

I washed the fabric, traced the pattern and am almost ready to start sewing. I’ve been reading parts of David Page Coffin’s book (lots of information but so difficult to read) and want to read a bit more on construction as I want to make it a real classic shirt.

Tips and information links very welcome!

Thursday, October 6, 2016

The fabric does it

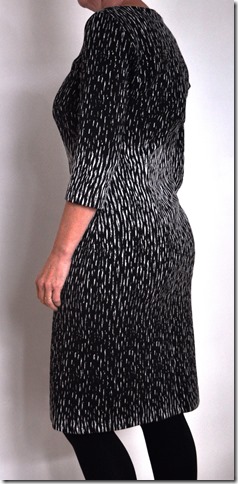
I think this dress looks great but it’s all about the fabric. It’s almost as easy to make as a t-shirt: a (heavy) knit fabric, for most parts constructed with a serger. I added a zipper in the back but this was completely unneccessary. I don’t need it to put it on or off. The next iteration will have no zipper so will be even more easy to construct.

DSC_2120

DSC_2123


In the pictures I now see that I should have pulled the right sleeve down a bit. Now the shoulder looks off. Well, it’s these or no pictures.

The pattern is my dress sloper I drafted myself. Only adjustment was the neckline. Two weeks ago this was an instant gratification project for me. From time to time we all need those, don’t we?

Wednesday, October 5, 2016

Follow up on a skirt

Hi all. It’s been a bit longer than I thought. October already. I moved house and now live close to the city of Leiden, which is a lovely old Dutch town, not very far from Amsterdam (the city that most of my foreign readers will know).

I’ve been sewing a little bit and have lots of sewing plans for the next months. Time to pick up on blogging again too.

The first project I’d like to share is a skirt. Remember the Knip Mode skirt I started in March? A reminder of the line drawing and my initial, unfinished version.

line drawing

Skirtback original

I did not finish it in the end because of the fact I did not like the fabric, the back felt too low and the yoke didn’t do a lot for me (actually accentuated my hip a lot). Also I felt the curves stopped abruptly at the top. Still, I liked the general idea of it and made a different version in which I omitted the yoke and settled for a dart both in the front and the back. The difference in sizes between waist and hip is too big to be able to rotate the last dart out. At least, that’s how I felt about it.

This is my new version, much better for me. Not as much flare in the back as the original pattern, but still a distinctive feature of the skirt. The dressform is not really my size. I’ll show pictures on me when a jacket I plan to sew is finished. The fabric is deep black, so very difficult to photograph the details.Even making the photos lighter doesn’t improve it much.

DSC_0261DSC_0262DSC_0260  DSC_0263DSC_0265